Create a UIButton completely in code using Swift
Written with Swift v5.2
Objective
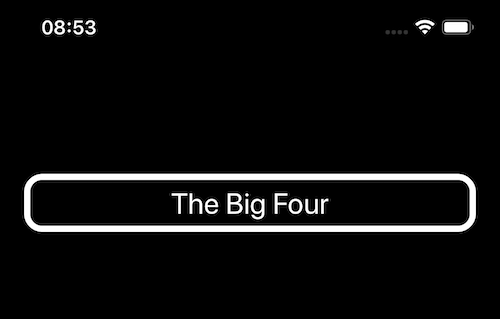
Deciding it was time to embrace building views in code as as well using Interface Builder, I set myself the challenge to build a simple UIButton completely in code.
Here’s what I made:

In the interests of keeping things as simple as possible, I chose a minimal approach. I have a bigger demo in the works already!
And here’s the code that I came-up with for that above UIButton:
final class ViewController: UIViewController {

  private let button: UIButton = {
    let button = UIButton(type: .system)
    button.backgroundColor = .black
    button.tintColor = .white
    button.layer.cornerRadius = 15
    button.layer.borderColor = UIColor.white.cgColor
    button.layer.borderWidth = 5
    button.translatesAutoresizingMaskIntoConstraints = false

    let titleAttributes: [NSAttributedString.Key: Any] = [
        .font: UIFont.systemFont(ofSize: 26)
    ]

    let titleAttributedString = NSAttributedString(string: "The Big Four", attributes: titleAttributes)
    button.setAttributedTitle(titleAttributedString, for: .normal)

    return button
  }()

  override func viewDidLoad() {
    super.viewDidLoad()

    button.addTarget(self, action: #selector(handleTap), for: .touchDown)
    view.addSubView(button)

    NSLayoutConstraint.activate([
      button.topAnchor.constraint(equalTo: view.layoutMarginsGuide.topAnchor, constant: 100),
      button.leadingAnchor.constraint(equalTo: view.layoutMarginsGuide.leadingAnchor),
      button.trailingAnchor.constraint(equalTo: view.layoutMarginsGuide.trailingAnchor),
      button.heightAnchor.constraint(equalToConstant: 48)
    ])
  }
}

@objc private func handleTap(_ sender: UIButton) {
 // handle the button being tapped
}
Key take-aways
UIViews need constraints before they can appear properly (top, leading, trailing, height, width, pinning, etc)NSLayoutConstraint.activatewill let you add a whole bunch of constraints at once and activate them- Handling button taps is easy with
UIButton.addTarget; it will allow you to specify an Objective-C selector function to deal with the tap